Getting Started
Before you start using the Office 365 Connector, there are a few steps you must take. Since the Office 365 Connector relies on the OutSystems Platform's REST capabilities, you must:
- Have access to an Office 365 account;
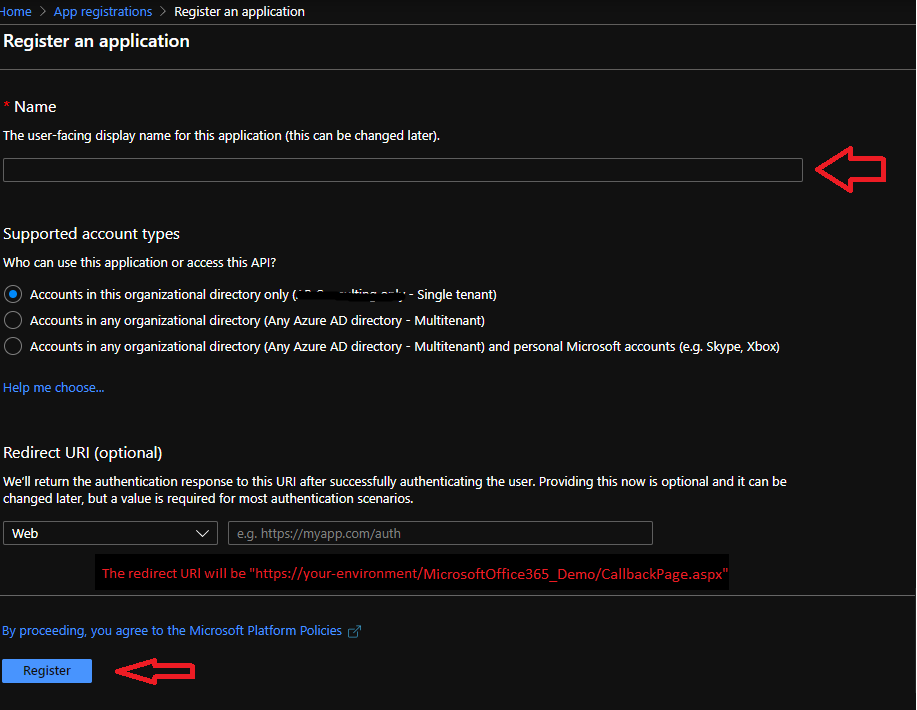
- Register your Project in Microsoft Azure Portal;
- Set your Redirect Url and Scope;
- Retrieve your Client ID and Client Secret;
- Fill in the configuration screen form, in order to try out the Connector's demo
Here's how:
Register your Project in Microsoft Azure Portal

Using User Sign In
Using Application Sign In
Read more information on how to sign in using a user
here.After registering the application and setting up the redirect URl, we have to configure it's permissions:
After completing the previous steps, our application is ready to be used.
Scope
The scope will be the permissions you want to be used.
For example, in this case the scope would be "Calendars.ReadWrite+Group.ReadWrite.All+GroupMember.ReadWrite.All+User.Read".
Read more information on how to sign without using a user
here.After registering the application and setting up the redirect URl, we have to configure it's permissions:
Scope
For the application sign in the scope will be https://graph.microsoft.com/.default
Tenant
The directory tenant that you want to request permission from. This can be in GUID or friendly name format. If you don't know which tenant the user belongs to and you want to let them sign in with any tenant, use common.
ClientId and ClientSecret
You can find the ClientId on the overview page:
And create a ClientSecret on the Certificates & secrets page: